
Printing Maps
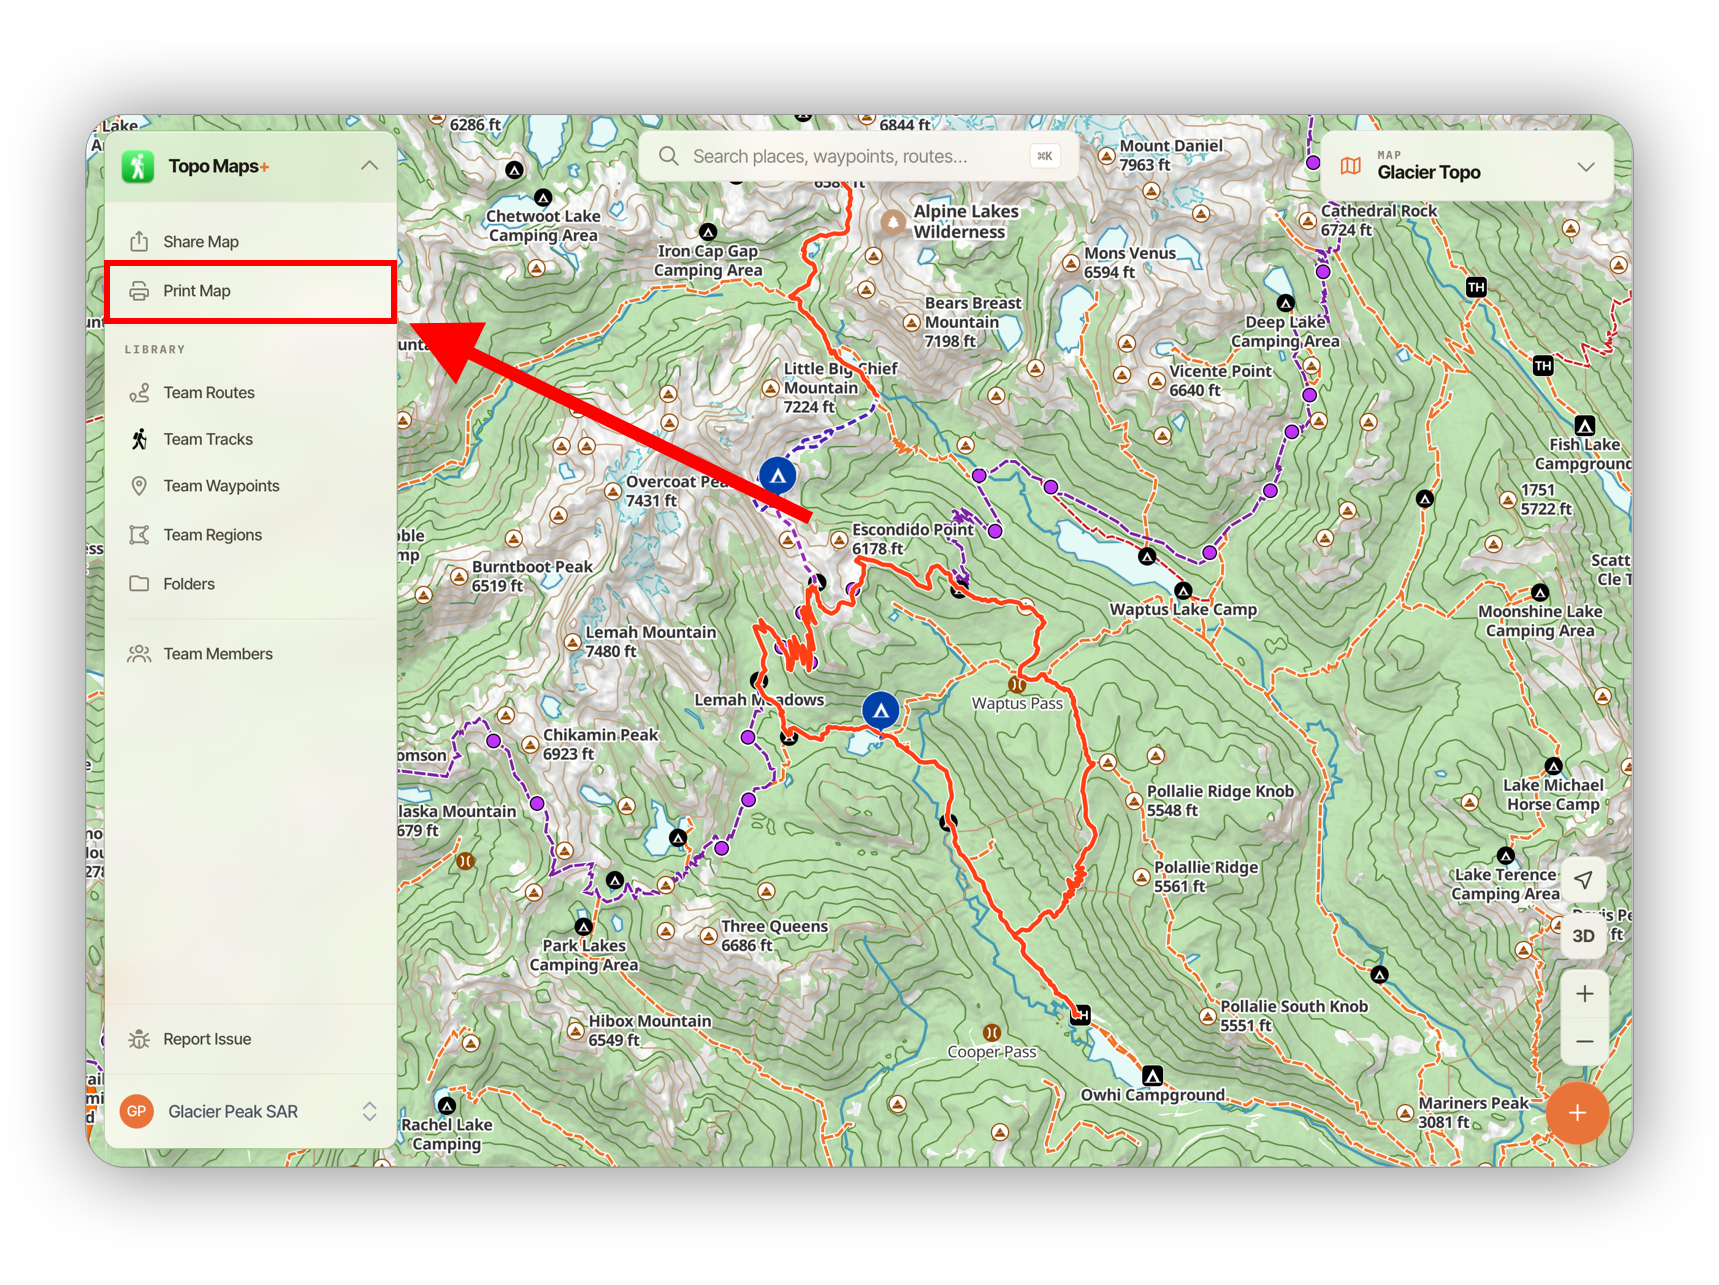
To open the print view, click Print Map from the menu:
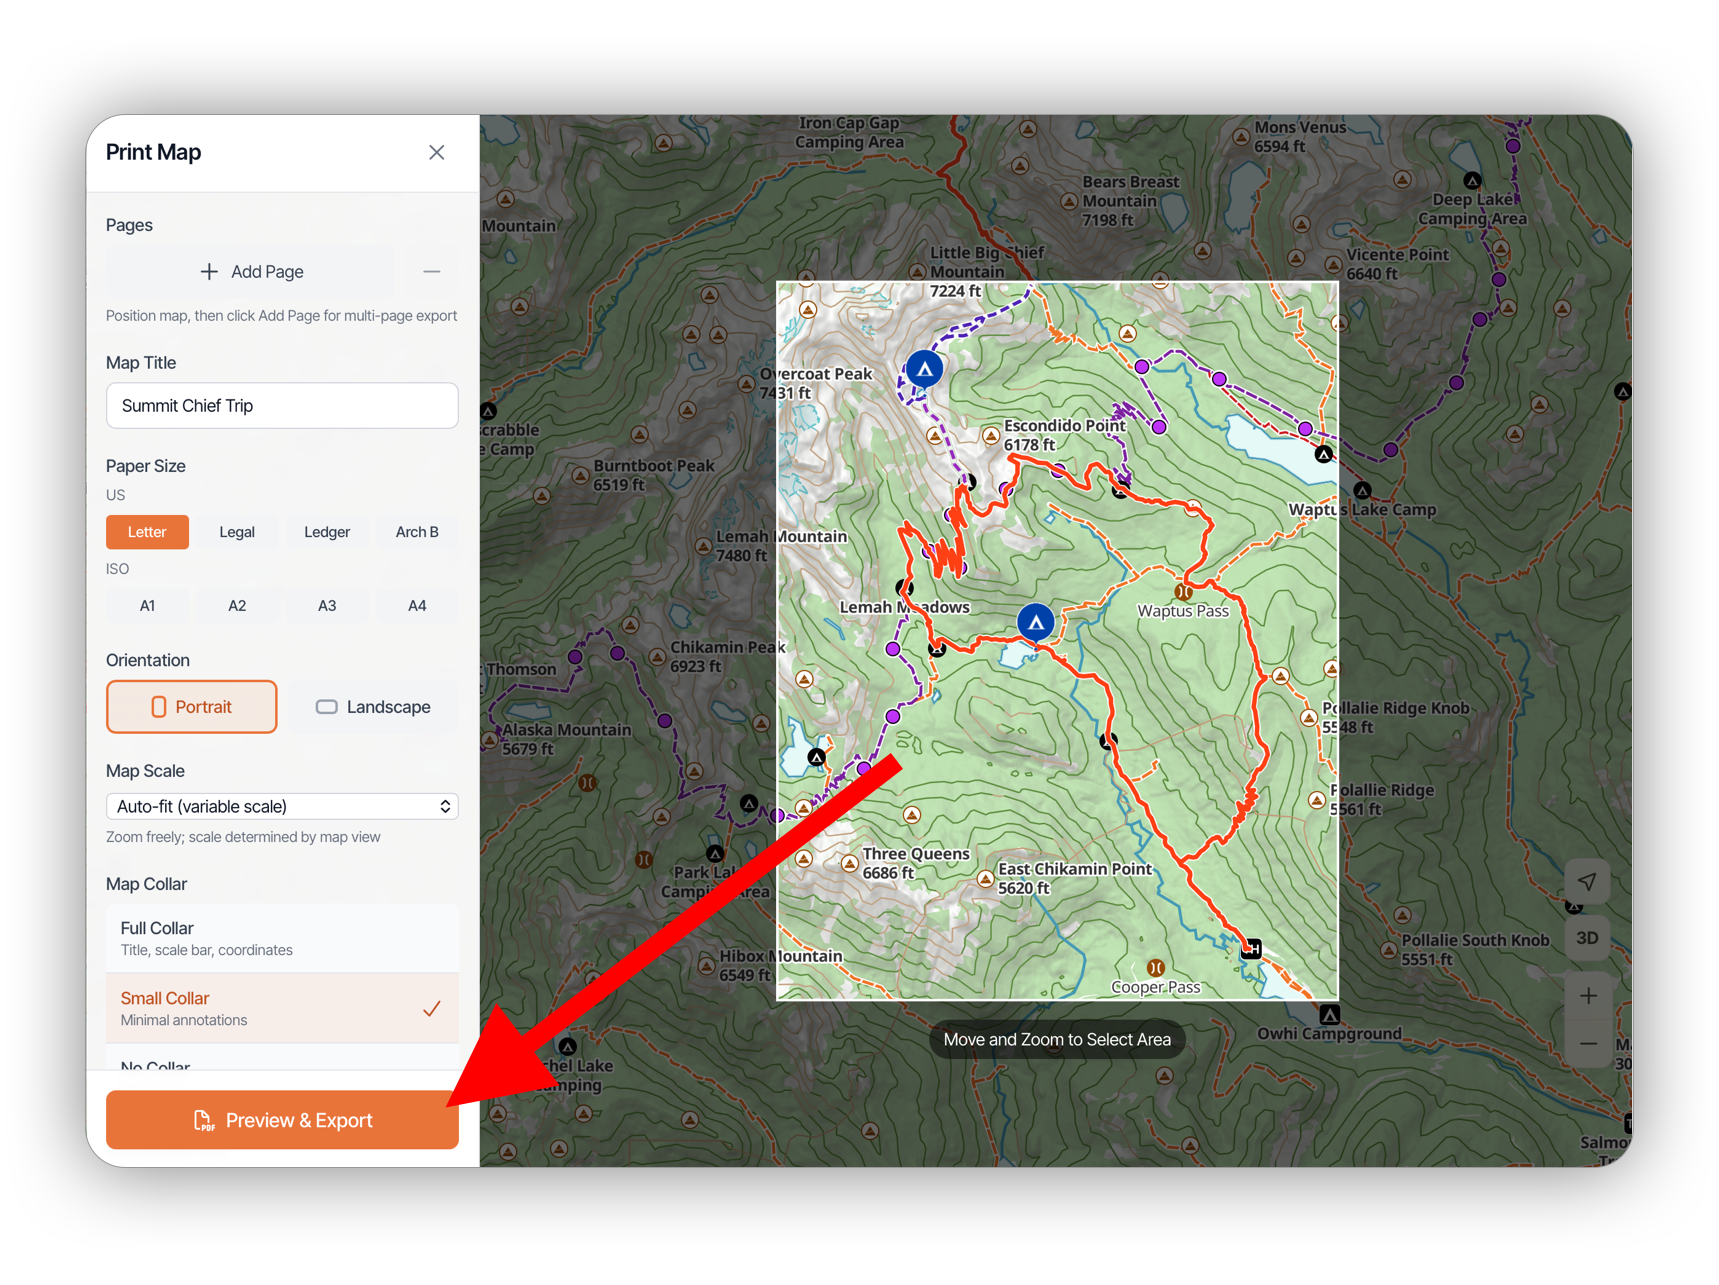
If you aren't particular about how your page is configured, the default settings will probably work well for you. Simply center the print area on the section of the map you want to print and click Preview & Export.
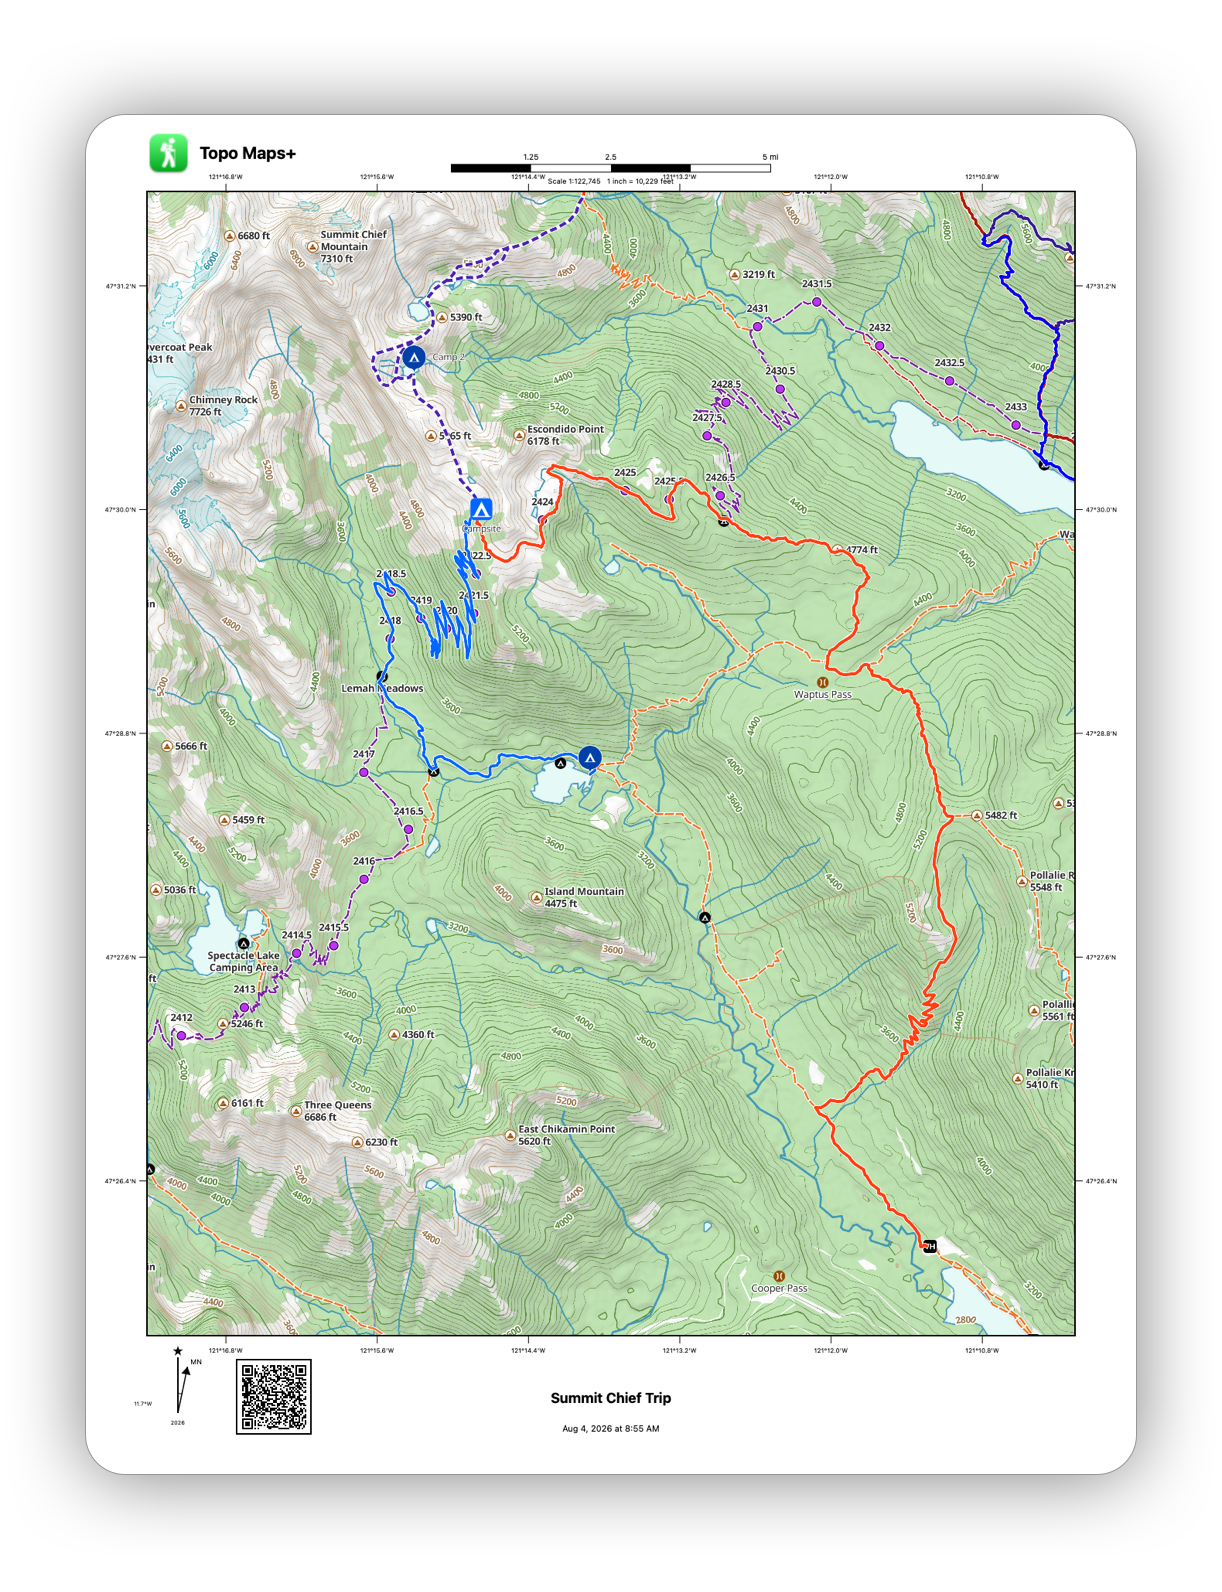
This is what a print looks like with the default options:
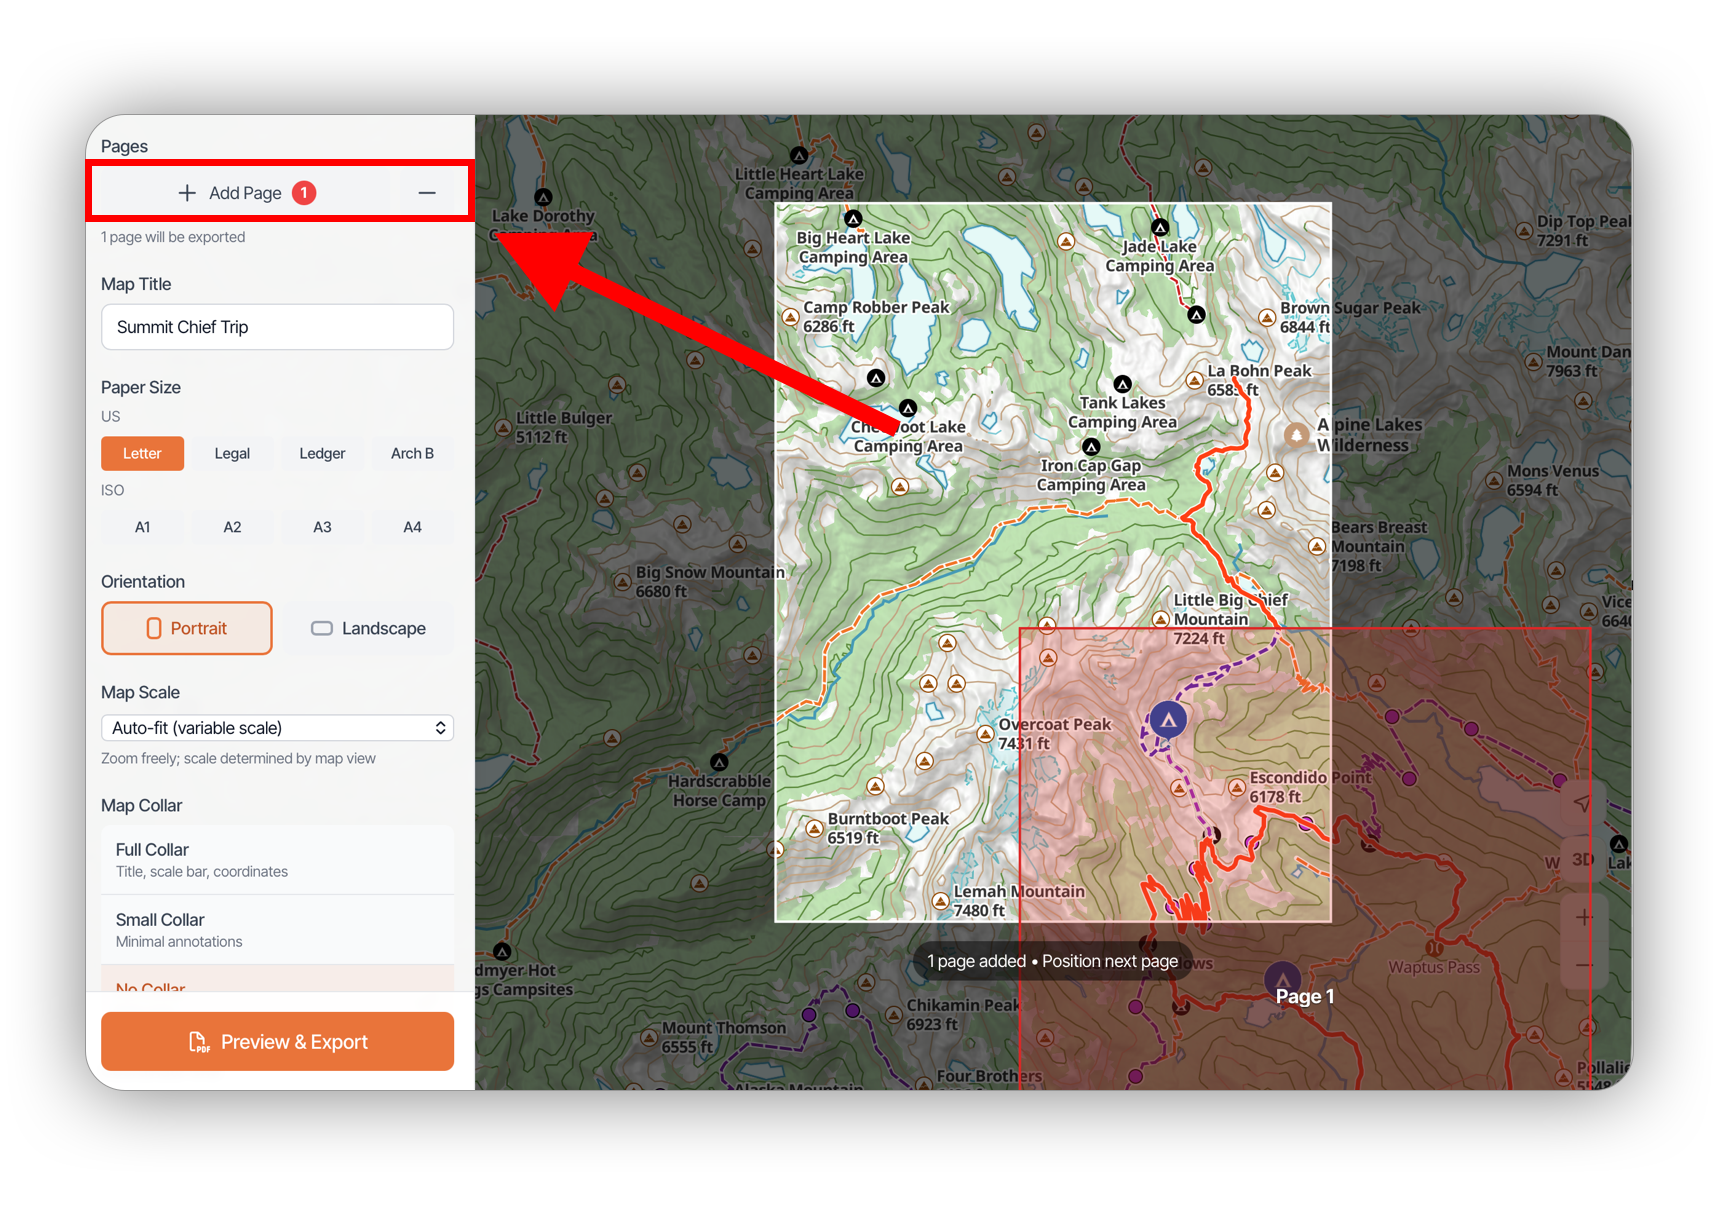
If you want to print several adjacent areas together (for example, you want 1:24,000 sections of the area), you can add pages to print all at once:
If you want to customize how the page looks, here are all the options:
- Map Title — Add a title to display on the page
- Paper Size — Change the target paper size to match the dimensions of the paper you're using.
- Orientation — Switch between portrait and landscape.
- Map Scale — Set a fixed scale (e.g. 1:24,000) for the map to print to.
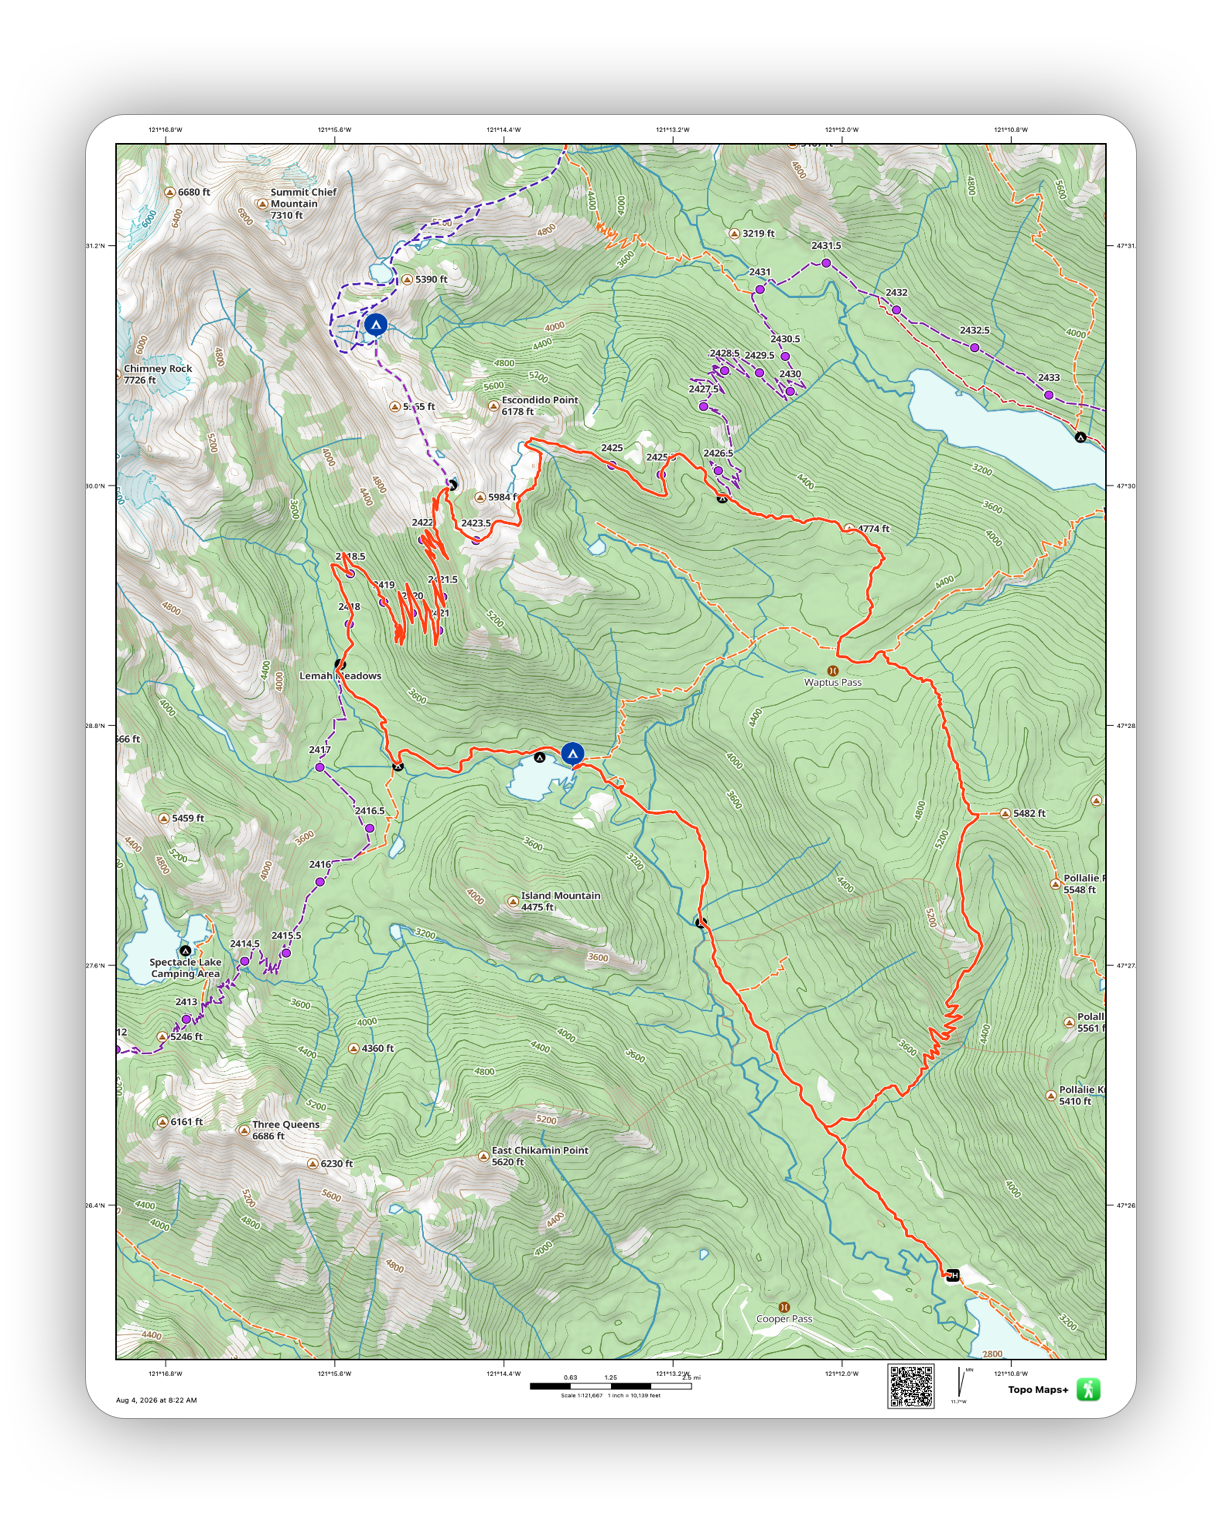
- Map Collar — This adjusts how much space & information go around the border of the printed map. See images below.
- Coordinate Grid — Choose tick marks, full Lat/Lon or UTM grid, or no grid.
- Include Scale Bar — Add or remove the scale bar to the page.
- Include Declination — Add or remove the declination indicator to the page.
- Include My Data in QR Code — Topo Maps+ prints include a QR code that links to the map boundary, so someone can scan the code and open the same area in the app. You can choose to include your map data in this code, so your friends can scan the QR code and import your data. This is set to OFF by default to protect your data privacy.
- Export Format — Choose between PDF, JPG, and PNG.
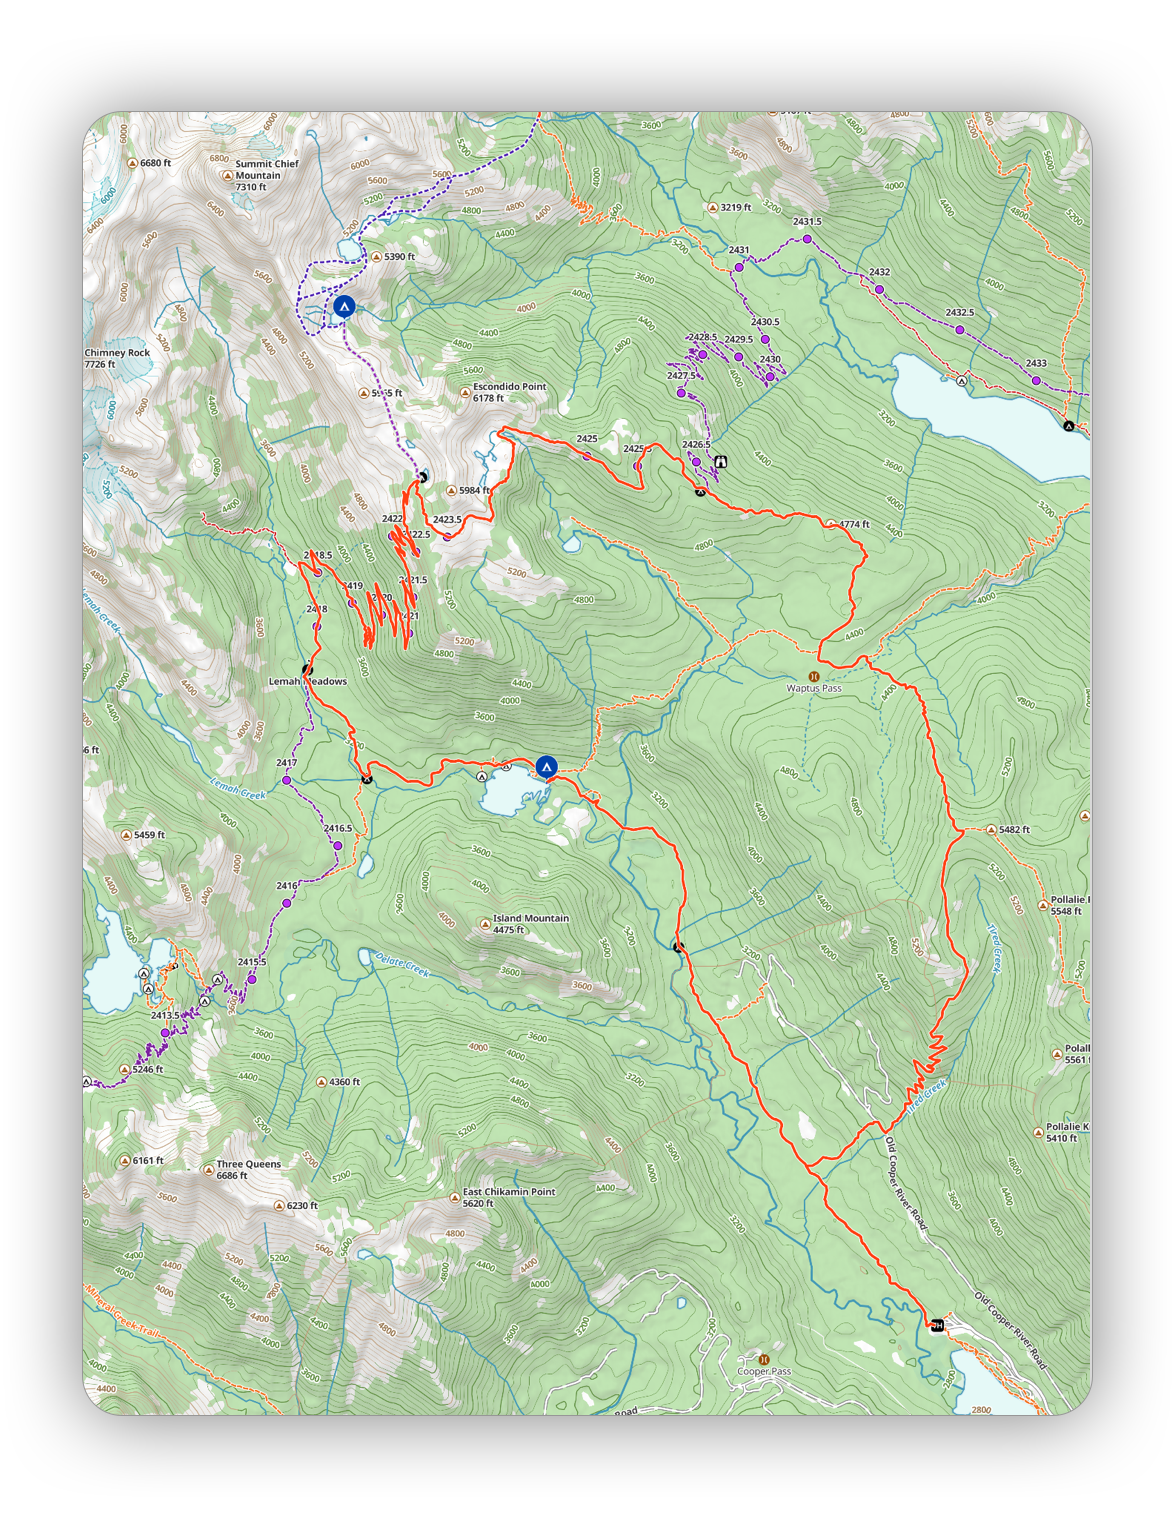
Here are the 3 collar types compared.
No Collar:
Small Collar:
Full Collar: